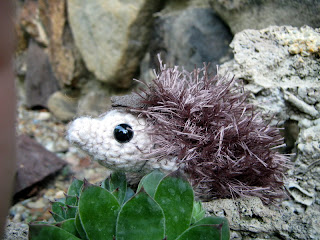
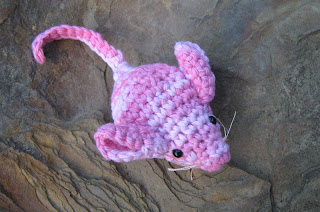
My little sister has always been a collector of animals. When we were young, she was the one who brought home all the strays. My mother encouraged her, and between the two of them, over the years, they have had almost every legal pet you can think of (I'm sure they'd have brought home tigers and bears if they could have). There have been dogs, cats, hermit crabs, fish and lizards, of course. But also goats, a trio of naughty raccoons whose mother was struck by a car, a miniature horse, snakes, rats, mice, guinea pigs, every kind of amphibian you can think of, from newts to tropical poison dart frogs, crickets, and (of course, you've guessed from the pictures) hedgehogs.
Now my sister is married and taking care of a whole new kind of animal--three little girls. She has slowly reduced her pet inventory over the last ten years until now she has only one lovely Bearded Dragon habitat. The dragons crack me up because two are lovely fat preening creatures, but the third was a 'runt' of sorts that was given to my sister as a free bonus with a feed purchase at the annual Reptile Show. Even with a constant supply of gut-fed crickets and meal worms, the little fellow looks like a pale yellow shadow to his tank mates.
Perhaps because of the reduction of pet inventory, or perhaps just because my nieces share their mother's love of a good collection, the stuffed animal section of the family's home is a wonder to behold. At first I was worried that this tiny hedgie might get thrown into the toy box with the larger stuffed friends, but I should have known better. He has been given a place of honor in my sister's room. I think it reminds her of the hedgehog she had in college.
The woodland creatures theme is popular right now. I have seen a lot of cool hedgehog themed stationery, rubber stamps and stuffies. This little amigurumi is my crocheted contribution to the hedge-mania.
If you have any trouble making him, feel free to send me an email or comment on the post. Some of the steps are difficult to describe and I hope I've done it clearly, but I'd welcome the opportunity to clarify if needed.
Meiphemera Amigurumi Hedgehog
(I use an H or I-hook for this.)
Prickles:
Using brown eyelash yarn, ch3, join
R1: 6sc into hole. (6)
R2: 2sc into each ch around (12)
R3: *sc into first ch, 2sc in next ch* total of 6x (18)
R4: *sc, sc, 2sc* total of 6x (24)
R5: *sc, sc, sc, 2sc* total of 6x (30)
R6: *sc, sc, sc, sc, 2sc* total of 6x (36)
R7: *sc, sc, sc, sc, sc, 2sc* total of 6x (42)
R8: sc around (42)
R 9-12: sc6, ch1, turn
Head/tummy:
(I use G or H hook)
chain3, join
sc 6 into hole (6)
sc into each ch around (6)
*sc, 2sc* 3x (9)
sc into each ch around (9)
*sc, sc, 2sc* 3x (12)
R 6: sc6, 2sc, sc, 2sc, 2sc, sc, 2sc (16)
R 7: sc6, 2sc, sc, 2sc, sc, 2sc, 2sc, sc, 2sc, sc, 2sc (22)
R 8: sc around (22)
R 9: sc6, *invisible decrease, sc* 5x, sc (14)
R 10-21: sc 6, ch 1, turn
Place safety eyes into the head, being sure that the tummy is at the bottom.
The sewing process is a little different than most amis because of the two different yarns and two different hook sizes. You will not be sewing each chain to the corresponding chain in the next piece. Instead, sew the pieces together as you would any other kind of fabric; line the two pieces up together and sew regardless of chain spacing.
Step 1: sew the end of the 'flap' on the back to the end of the 'flap' on the tummy. Make sure the head is in the correct orientation. The way I do it is sew from the 'wrong' side, making sure that both 'right' sides are on the inside.
((The next parts are difficult to describe with words. I've made a bunch of these guys and never had the foresight to take a picture of this part. Maybe I'll make another to take pics, but in the meantime, bear with me. Basically, you will be starting at the tail, sewing up along one side to the head, sewing the head ONTO THE BACK ITSELF, and then back down the second side to the tail. This may be obvious and intuitive. Feel free to stop reading here if you have no problem visualizing the rest on your own. )))
Step 2: The 'flap' of the back will need to be sewn to the adjacent curve of the shell, so that for the first few stitches, you will sew back fabric to back fabric. When you get to the tummy section of the flap, you will be sewing the tummy fabric to the back fabric. Keep working along the side of the hedgie until you reach the head.
Step 3: Stuff the head only. DO NOT SEW THE EDGE OF THE HEAD TO THE EDGE OF THE BACK. Position the head onto the back and sew the edge of the head through the section of the back that it touches when the head is placed in a natural position.
Step 4: Sew along the second side, back toward the tail. If you've done it just right, you'll be able to sew tummy to back, stuff the hedgie, then sew the back fabric to back fabric. If you've not done it just right, don't worry, the eyelash fabric you've created is very forgiving. Just sew along the side and stuff, lining it up as you go. Once you've finished, roll the hedgie in your hands to adjust his shape, and you're done!
Feel free to add a little necklace or head bow to your hedgie.
Enjoy!


